
Escape the Backrooms Maps: Find Your Bearings
Match a landmark, locate your next objective, and keep a route back in mind. Open the walkthrough when you need the steps behind the map.
Choose the Area You Are In
Maps for the covered areas, with route notes and links to the matching guides.
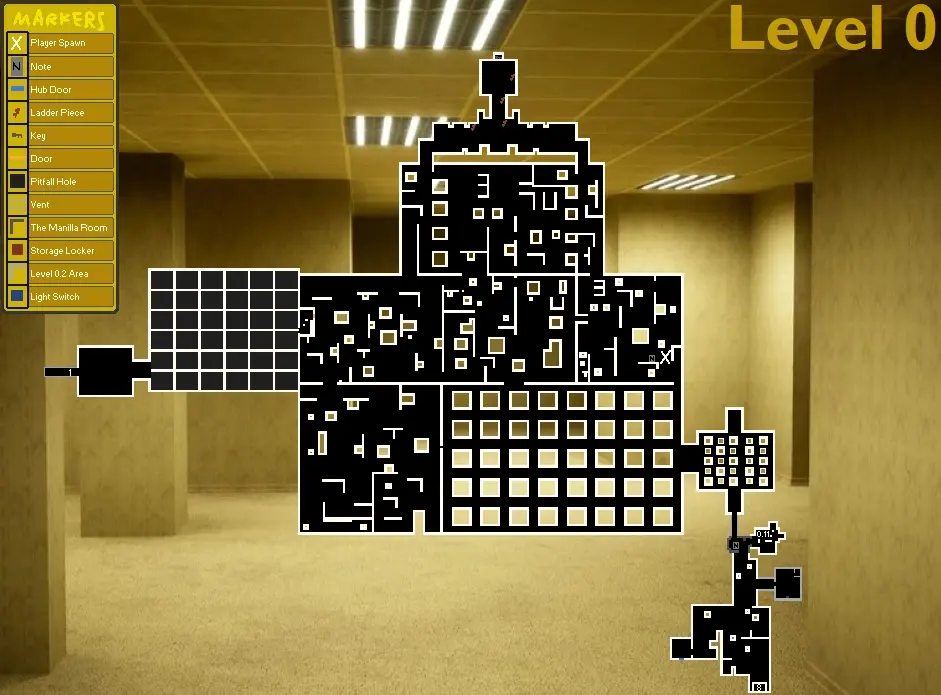
Level 0 Map
Use the ladder, locked door and pitfall area to orient yourself in the yellow maze. This Level 0 map connects the repair-and-key objective with the exits toward Level 1.
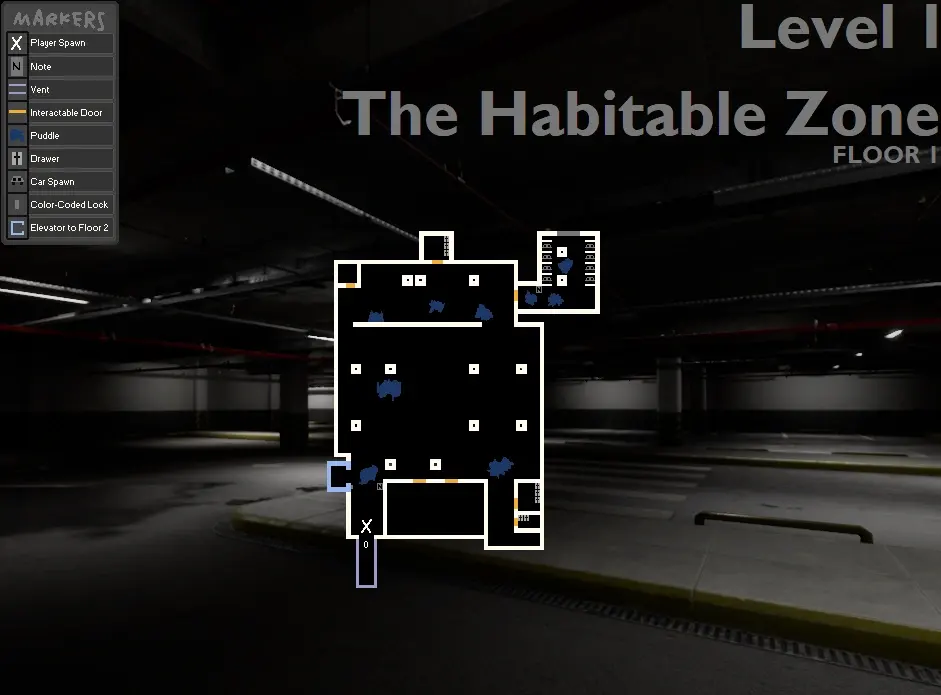
Level 1 Floor 1 Map
Find the car room before heading to the elevator on Level 1 Floor 1. The marked entrance and color-code elevator give your group shared landmarks while you work out the next floor.
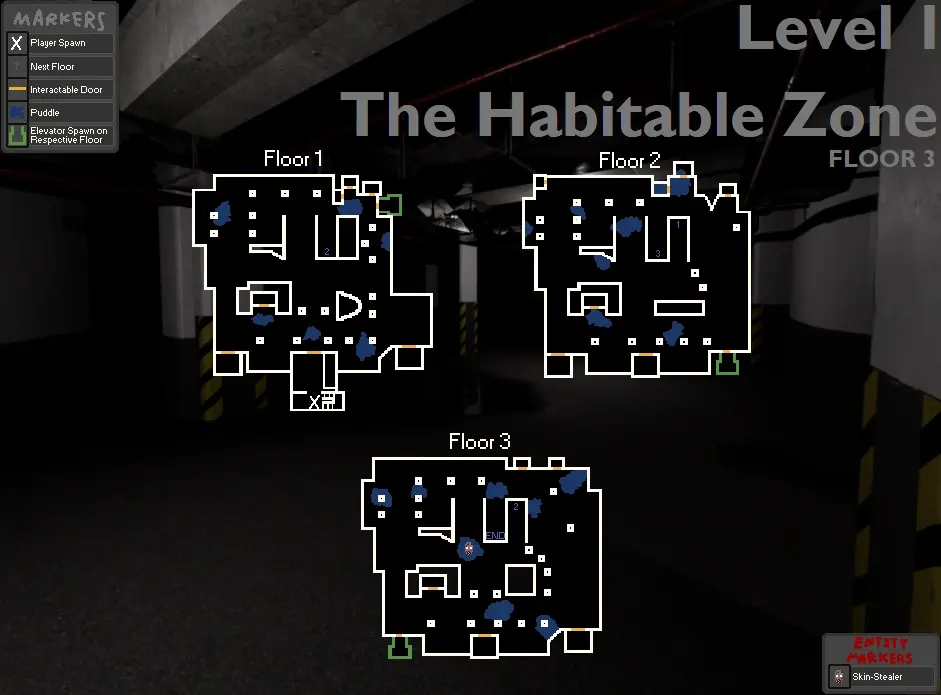
Level 1 Floor 3 Map
Match your position to the darkness entrance, downward ramp or elevator exits on Level 1 Floor 3. These landmarks help you choose a floor connection without repeatedly retracing the same corridors.
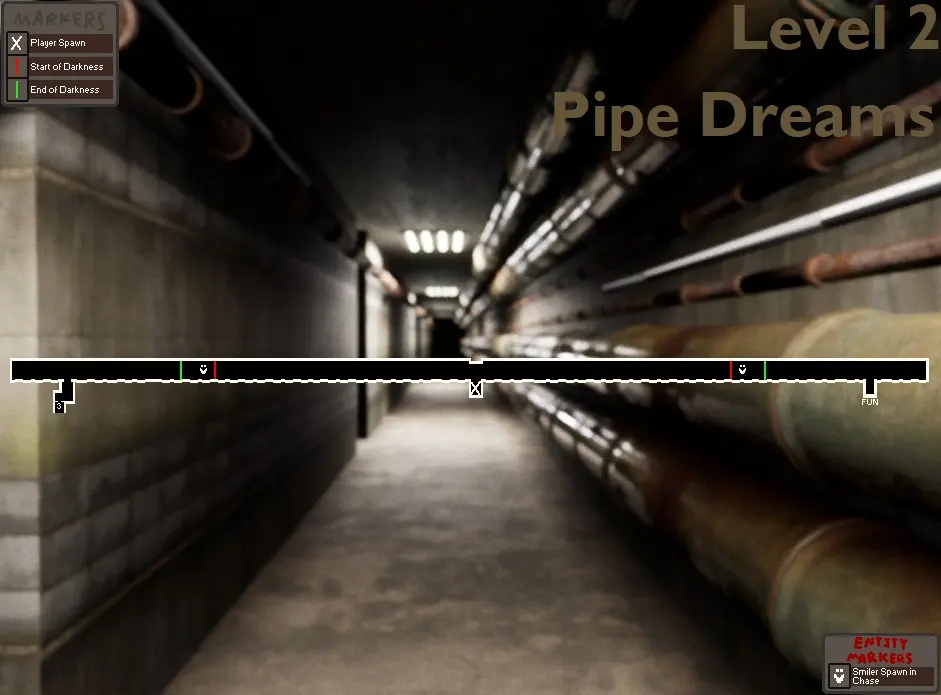
Level 2 Map
Check which entrance you are heading toward before committing to another pipe corridor. The Level 2 map distinguishes the route to the Electrical Station from the entrance to Level Fun.
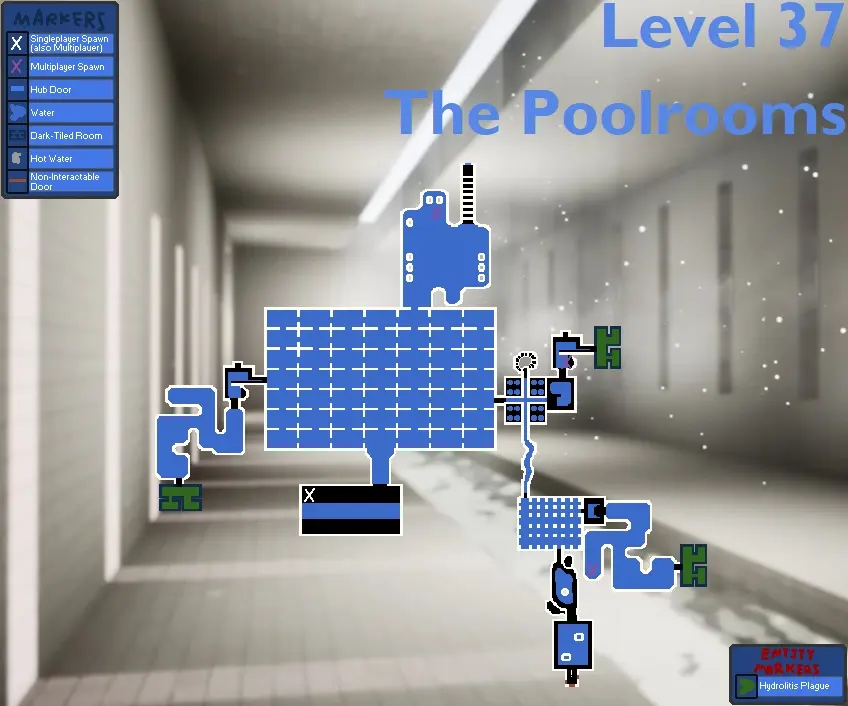
Level 37 Map
Locate your spawn and trace a Poolrooms route around the dark-tiled rooms and hot-water stairs. The map also marks the Hub door and the entrance to Level ! so you can choose your destination.
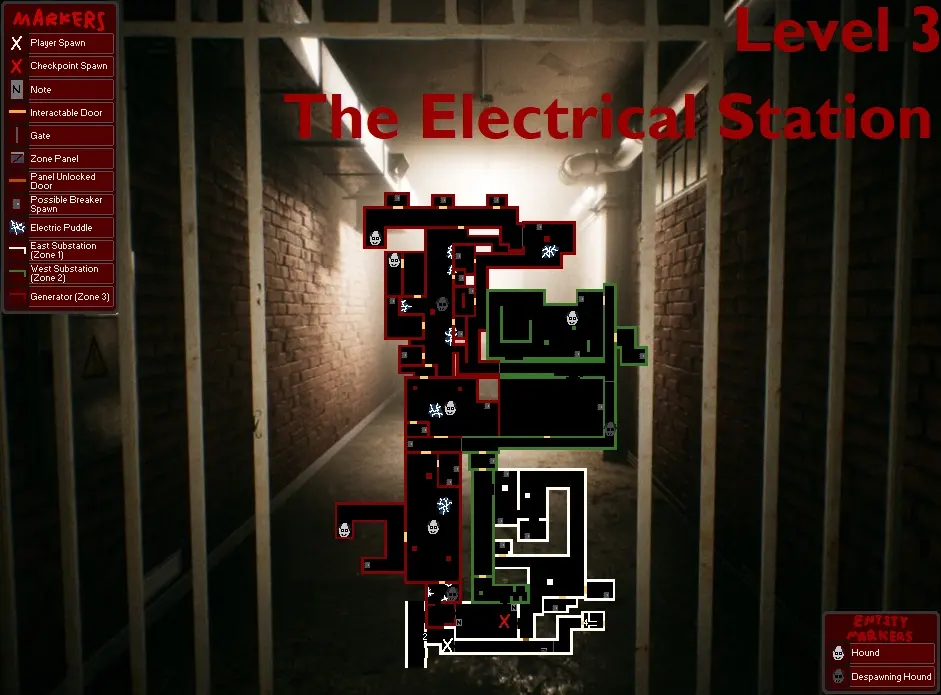
Level 3 Map
Plan your breaker search across the East Substation, West Substation and Generator areas. This Level 3 map pairs the nine-breaker objective with the zones where Hounds and electrical puddles complicate movement.
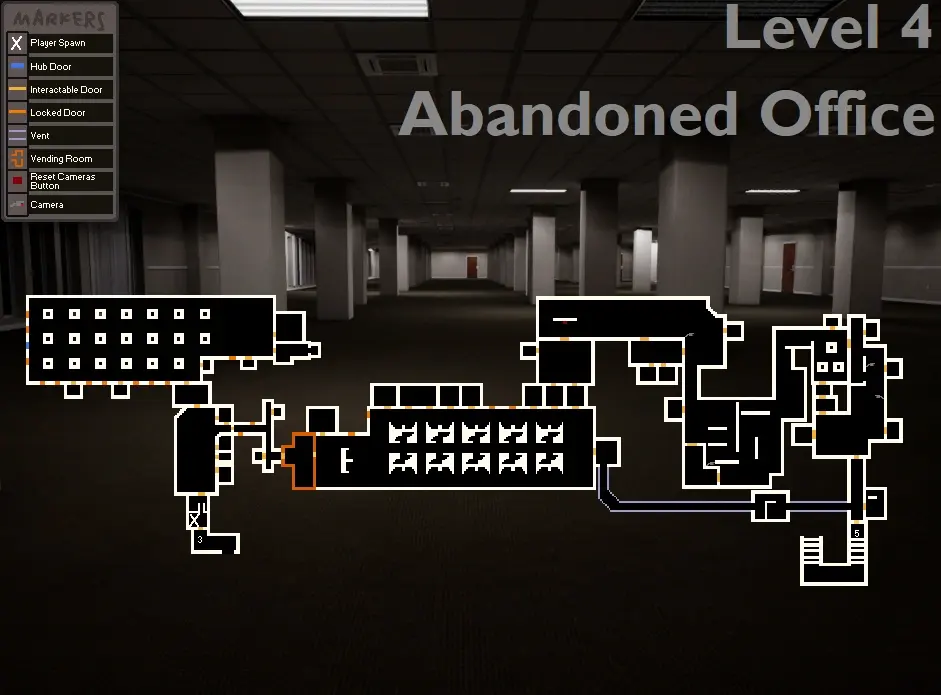
Level 4 Map
Separate the vending-machine puzzle from the camera section before crossing the abandoned office. Use the marked reset button, vent and Level 5 entrance to recover your route if a camera spots you.
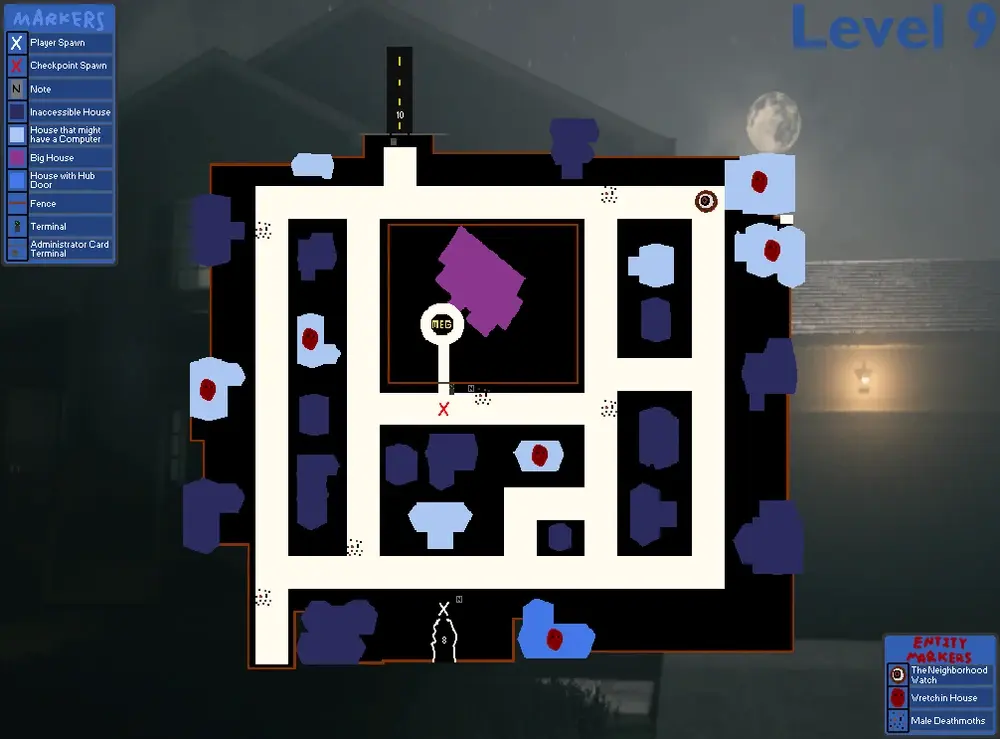
Level 9 Map
Start with the gate terminal, then plan which houses to check for computers. This Level 9 map distinguishes houses with Wretches and marks the Outpost, Hub and Level 10 entrances.
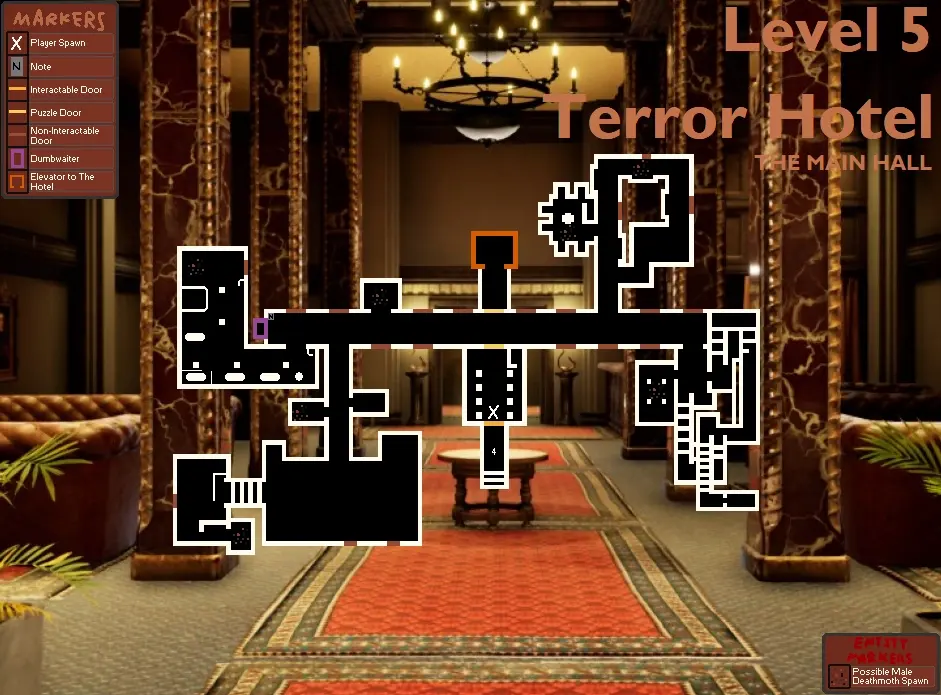
Escape the Backrooms Level 5 Map: Terror Hotel
Choose the map for the Hotel task currently blocking your group: Main Hall keys, mailbox papers or the Boiler Room exit. Each section highlights the landmarks needed to finish that part of Level 5.
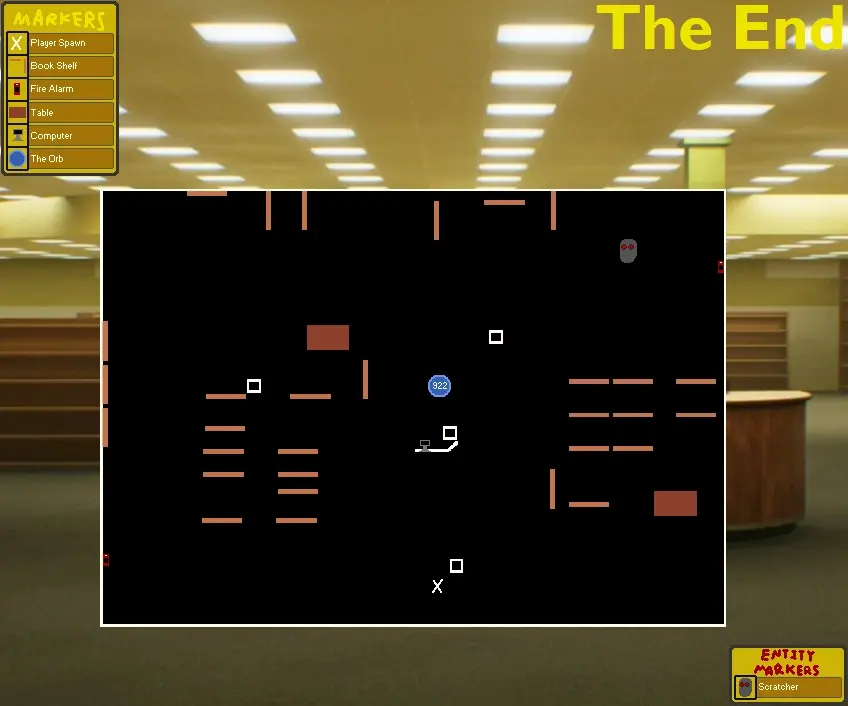
Escape the Backrooms: The End Map
Use the library layout to locate the computer, fire alarms and tables before searching for tapes. The separate tape reference suggests shelf areas to check; its observed spawn dots are not guaranteed pickups.
Before You Look for the Key
Collection steps and prerequisites for Levels 0, 1, and 5.
Check the Task, Then the Location
Finding a key can depend on completing an earlier step. Use the level-specific instructions below to check what to collect, where to look, and how the key is used.
Level 0
1 KeyCollection Steps
- Collect all broken ladder pieces in the room
- Repair the ladder
- Use the ladder to reach the hole in the wall
- Collect the key from the hole
Level 1
4 KeysCollection Steps
- Navigate to Section II of the level
- Search wardrobes around the level
- Collect all 4 keys from different wardrobes
- Insert all keys into the keyholes
- Escape through the unlocked door
Level 5
3 KeysCollection Steps
- Find Moth Jelly on The Entry Floor
- Locate the Food Elevator in the main hallway
- Place Moth Jelly in the Food Elevator
- Receive 3 keys as reward
- Use keys to unlock the exit door
- Enter the elevator to escape