Hound appearance and current behavior
Apparence : Un chien humanoïde plus rapide que le joueur. La lampe peut l’aveugler brièvement et une porte fermée l’arrête, car il ne sait pas l’ouvrir.
Comportement : A Hound is faster than you, but it has two clean weaknesses: light in the eyes blinds it for a few seconds, and it cannot open a closed door. Crouching is not the answer here.
Niveau de menace : 3/5 — The flashlight is not damage. It is a few seconds of route access, so decide what those seconds are for before you aim.
Observé dans : 2 itinéraires documentés.
Where Hounds interrupt the route
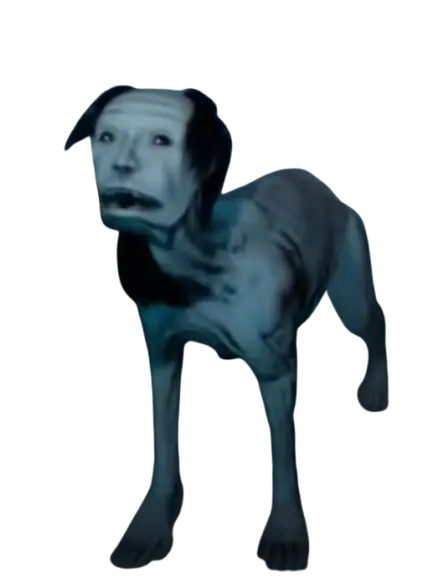
The Hound runs low and fast
Its silhouette is closer to a thin humanoid dog than a normal animal. Because it moves on all fours, players often sweep the flashlight over it while watching the middle of the screen.
Bring the beam down to the eyes and keep a door in the same mental picture. The stun is useful only if the next movement is already decided.
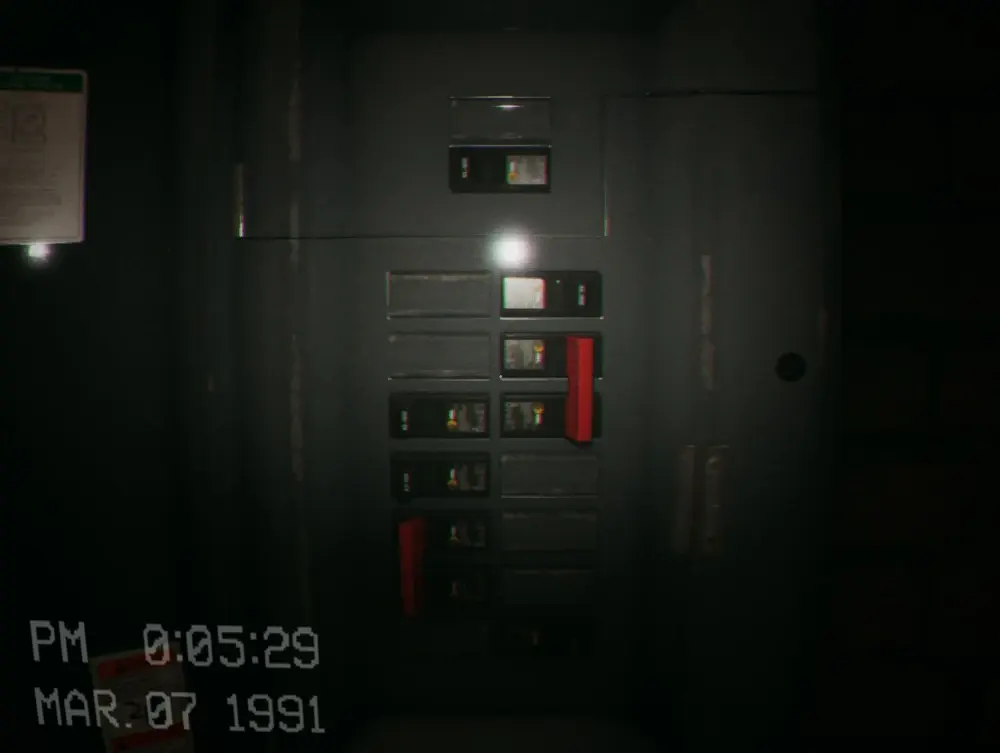
Use the stun to buy the panel, not to clear the level
At a breaker, the temptation is to flash early so the room feels safe. Wait until the charge creates a real problem, blind it, and spend the window on the switch.
If the panel will not finish before it recovers, abandon the interaction. A second clean attempt from behind a door is faster than dying with the breaker almost complete.
The Level 3 Electrical Station walkthrough shows where the breaker work and Hound pressure overlap.
What to do when a Hound charges
Save the flashlight stun until the charge, then use the blind window to finish one interaction or reach one closable door.
Signe distinctif
The low four-legged silhouette and fast approach are enough. Do not wait for the full model to enter the beam before deciding where the door is.
Réaction immédiate
Put the flashlight on its eyes, keep the beam steady until the stun registers, then move immediately toward the chosen panel or door.
Réinitialiser la rencontre
Close a door between you and the Hound. On Hard or Nightmare, allow the chase to reset before expecting the eyes to respond to light again.
Hound tips for co-op
One player blinds; one player interacts. Everyone else stays out of the doorway so the retreat remains usable.
Ce qui fait échouer une partie : Trying to crouch behind the Hound or spending the only reliable stun while it is still far away and not blocking anything.
Hound patrol points
Ces notes concernent les itinéraires ; elles ne promettent pas que l’entité sera toujours à un emplacement fixe.
Dark Electrical Station corridors
A stun creates a short interaction window at a breaker, but the patrol may remain after the panel is complete.
Beverly Room hotel hall
The ceiling-code route should be planned before exposing the team to the hall.
How to blind and escape a Hound
Put the flashlight on its eyes, keep the beam steady until the stun registers, then move immediately toward the chosen panel or door.
Hound route notes for solo and co-op
Utilisez ces points comme un court rappel. Ils décrivent les décisions à prendre avant, pendant et après la rencontre, pas un script rigide.
Electrical Station breakers
Solo : Keep the beam ready at body height, blind only when the Hound commits, and either finish the breaker immediately or leave. Standing at the panel to watch it recover wastes the window.
Coop : The light holder faces the hall while the second player works the box. If the stun fails, both retreat through the same named door.
Beverly Room and Room 21
Solo : Plan the target room before stepping into the corridor. Blind the Hound, go straight there, and close the door; random door checks keep you exposed too long.
Coop : Send the code reader or room checker after the flash. The rest should hold the safe side instead of filling the hall.
Hard and Nightmare
Solo : Assume one usable blind per chase. Do not test the immunity from open ground—reset behind a door first.
Coop : Call “stun used” so nobody stands in the lane expecting a second flashlight to work immediately.
Flashlight stuns and difficulty changes
Save the flashlight stun until the charge, then use the blind window to finish one interaction or reach one closable door.
Aim for the eyes
The stun is tied to the Hound seeing the flashlight. A beam swept over the ceiling or switched off too quickly can leave it charging.
Difficulty changes reuse
Easy and Normal allow more than one stun when they are spaced out. Hard and Nightmare effectively give one until the chase resets.
Doors are the reliable finish
The Hound cannot open doors. A door turns a short blind into a full reset, which is much safer than running until the light is ready again.
Hound locations in Escape the Backrooms
Escape the Backrooms : Niveau 3
Les Hounds patrouillent les couloirs sombres des disjoncteurs.
Meilleure réponse : Aveuglez les yeux au moment de la charge, puis utilisez ces secondes pour le panneau ou une porte fermée.
Ouvrir le guide du niveau →Rencontre 02Escape the Backrooms : Niveau 5.5
Un Hound patrouille près de la chambre 21 pendant le trajet du code.
Meilleure réponse : N’essayez pas de passer accroupi. Aveuglez-le, gagnez la bonne chambre et fermez la porte.
Ouvrir le guide du niveau →Before using the next flashlight stun
- Is the next closable door visible?
- Who is holding the light and who is interacting?
- Has the chase fully reset since the last stun?
Hound questions
Des réponses rapides lorsque une règle générale doit devenir une action précise.
Should I crouch around a Hound?+
No. Current Hound behavior is handled with the eye stun and closed doors, not the crouch rule used for sound-sensitive entities.
Can it outrun me?+
Yes. Sprinting buys time to reach a door, but it is not a complete escape plan.
Why did the second flashlight not work?+
On Hard and Nightmare, the Hound does not keep accepting repeated stuns in the same chase. Reset the encounter first.